TerdFerguson
All American
6570 Posts
user info
edit post |
Baller!!
do you just order those graphics from somewhere?  2/13/2013 9:52:24 AM 2/13/2013 9:52:24 AM
|
wdprice3
BinaryBuffonary
45908 Posts
user info
edit post |
man I so want you to redo my machine. 2/13/2013 12:58:23 PM |
Wolfmarsh
What?
5975 Posts
user info
edit post |
| Quote : | | "do you just order those graphics from somewhere?" |
Luckily for F-14 they are a printed vinyl sheet, done by the people who licensed all of the Williams properties after they went under. It's a real nice thick vinyl, and the printing is fantastic.
Otherwise I would have had to make stencils from the existing remnants and go from there.
| Quote : | | "man I so want you to redo my machine." |
Maybe one day, but I don't know if I want the stress of doing it for someone else.  I'm afraid at that point it feels like work instead of fun, plus if I fuck up my machines, it's on me. I fuck up yours and I'm screwed. I'm afraid at that point it feels like work instead of fun, plus if I fuck up my machines, it's on me. I fuck up yours and I'm screwed. 2/13/2013 7:08:44 PM |
wdprice3
BinaryBuffonary
45908 Posts
user info
edit post |
I've begun my garage transformation project. Plans were to: trim out windows and doors (simple trim, to cover gaps); prime & paint; install french cleat system throughout.
This is my first project of this size and needing good finishing work, so I'm a bit nervous.
Got my trim cut and installed this weekend. Didn't miss a cut until this last board  Luckily it was only 3/4" off and you can't really tell. Luckily it was only 3/4" off and you can't really tell.
However... my trim style didn't really turn out so well on the windows.
You can see the style I was going for (again, cheap & easy trim option to hide the drywall edge/gap). I went with a suggestion from Cass in another thread; just used 1x4s that I had laying around. I think it works; certainly not exactly what Cass had said, but I figured it didn't really look bad.
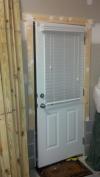
This was the best drywall-window sill edge. Fairly narrow and actually flush. I forgot to take before pictures of the door and double window. Those had gaps up to 1-1/2" and not a single piece of trim was true/level or flush with the drywall. I probably should have stopped there and figured out how to fix all the wonkiness... but I didn't... ha

And here's where my take on the style went wrong. Guess I should have used a 1x6 or done something a bit different. I'm thinking about just cutting off the top extensions.

Next is priming & painting... though I don't know if I have the wrong kind of paint... I wanted something that wouldn't show every defect, not be shiny or eggshell, easy to clean... so I was recommended.... Satin White Paint.... good or not? 3/4/2013 9:11:38 AM |
gunzz
IS NÚMERO UNO
68205 Posts
user info
edit post |
satin will show defects
i have a satin finish throughout my house and depending on the light and the angle you can see all the defects. at least in my place.
the more shine in the finish the more defects you will see. 3/5/2013 10:37:01 AM |
NutGrass
All American
3695 Posts
user info
edit post |
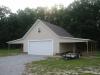
I built my shop, 24x36 with shelters and a half upper story, several years ago.
Well, since I built the shop, we had kids and my game room in the house is about to be absorbed with cribs, kids, and the like. So, basically, I decided to move my gaming operations to the shop.
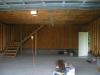
It has taken several months of working on it in the night time, but I am finally finished. I trenched in my internet line, and added a heating/cooling unit. The original goal was to just finish off the 1/2 upper story to have a gaming room. I quickly found that I have enough room upstairs to have a little hunting corner with my gun safe, cleaning table, etc.
upstairs before

and upstairs after

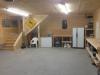
So, after finishing the upstairs, the downstairs just seemed bare--which lead me to finishing off downstairs. This was a nightmare as I had already been operating out of it for several years. I had to move things off of walls to the other side of the room while I was finishing one wall at the time.
Downstairs before
Downstairs after

Pretty fun project. Now, I'm moving to the shelters and placing rock so that I won't track dirt inside. 3/6/2013 5:23:24 PM |
YOMAMA
Suspended
6218 Posts
user info
edit post |
You get a good deal on some plywood? Just kidding, it does look good. Wish I had the room for a big garage and space like that.
 3/7/2013 12:16:56 PM |
NutGrass
All American
3695 Posts
user info
edit post |
haha. I wish I had a deal on plywood, sure would have helped! 3/7/2013 3:12:40 PM |
YOMAMA
Suspended
6218 Posts
user info
edit post |
Is that a fire hydrant at the front of your garage? 3/7/2013 5:19:57 PM |
NutGrass
All American
3695 Posts
user info
edit post |
Yea, I work with a sitework construction company and we have to demolish old water lines sometimes. I found one and just placed it as a display. I'm also on a local volunteer fire department, which adds to the cool factor of this hydrant. 3/7/2013 6:23:05 PM |
wdprice3
BinaryBuffonary
45908 Posts
user info
edit post |
Anyone know of a good paint edger? Got one for $5 at Lowe's and it sucks. 3/25/2013 1:11:01 PM |
CalledToArms
All American
22025 Posts
user info
edit post |
what are you edging? Against the ceiling? 3/25/2013 1:27:24 PM |
wdprice3
BinaryBuffonary
45908 Posts
user info
edit post |
yeh, at the ceiling/wall. 13' high ceiling, so it's not very fun. 3/25/2013 1:33:03 PM |
BobbyDigital
Thots and Prayers
41777 Posts
user info
edit post |
^^^
they all suck, imho.
pretty much the best edge options are crown moulding or sucking it up and taping. If you tape, get frogtape. waaaay better than the cheap blue stuff.
regardless, 13' high sucks for painting.
i said fuck it and paid someone to do our rooms with high ceilings. 3/25/2013 1:36:16 PM |
CalledToArms
All American
22025 Posts
user info
edit post |
^^gotcha. I was never happy with any edger I used. I decided to just tape that joint (tape on the ceiling butted up to the wall) and our lines were never more crisp. We tape off against the ceiling and cut in with a brush like I'd cut in at any trim piece.
This was on 10' ceilings though. If you have a decent ladder you could still do that of course but I'm sure you're probably trying to avoid the ladder route here. The only place I've given in to use the edgers was in our stairwell since I just wasn't going to mess with a ladder there.
[Edited on March 25, 2013 at 1:37 PM. Reason : ] 3/25/2013 1:37:02 PM |
wdprice3
BinaryBuffonary
45908 Posts
user info
edit post |
thanks. I have 3M painters tape, which I started using, but it actually peeled the damn primer off the wall  Maybe it was still wet (somehow) but It was at least 2 days between priming and taping. Maybe it was still wet (somehow) but It was at least 2 days between priming and taping.
I started by taping the ceiling for about 1/2 the perimeter, ran out of tape, then used the edger, which just made a mess. So I said screw it and finished the wall without tape/an edger. So I figure I'll just tape the wall all the way around and finish the ceiling and cover the mess. Though I'll wait a few more days to make sure the walls are completely dry (painted saturday, been humid/raining since)
Being on a ladder sucks, but I have no choice here. This is in my garage, so I wasn't planning on doing crown/trim  And working around the garage door and all my shit in the garage sucks (there isn't enough room for my ladder between the garage door supports and one wall) And working around the garage door and all my shit in the garage sucks (there isn't enough room for my ladder between the garage door supports and one wall)
My window trim paint also bled under the tape where there was caulking, so now my windows look like shit. Guess I'll just cut out the caulk, paint, then recaulk with clear caulking?
Also, my greyish-green paint looks greyish blue on the wall and I was trying something different and going with a somewhat dark grey for window/door trim... which turned out much darker than expected.
Maybe I just shouldn't be painting
[Edited on March 25, 2013 at 2:26 PM. Reason : .] 3/25/2013 2:19:03 PM |
BobbyDigital
Thots and Prayers
41777 Posts
user info
edit post |
I always wondered what it'd be like trying to paint wearing dry-wall stilts.
i suspect disastrous, but someone else should try this and report back. 3/25/2013 2:38:57 PM |
ncsuapex
SpaceForRent
37776 Posts
user info
edit post |
For edging around windows and doors and trim I've had great success with this.
http://www.youtube.com/watch?v=wwOYr7w3wmM
For edging a wall with popcorn ceiling I've found using a good a angled brush and patients works great.
I paint a stripe about 1/2" below the ceiling then push the paint to the corner of the wall/ceiling. The trick is to get just enough paint to push up the wall. Too much and it gets on the ceiling. I paint in about a 2' section. Then after I get the edging done I swipe the brush along the stripe to feather out the paint. Once I've painted the wall with the wagner power roller you can't tell the difference between the brush and the roller and there is no paint on the ceiling. Leaves a nice clean line.
I use this for the walls. I recently painted 2 rooms and the hallway. Best looking paint job I've ever done.
http://www.youtube.com/watch?v=NAxGdOGE2rg
[Edited on March 26, 2013 at 7:10 AM. Reason : 2] 3/26/2013 7:08:02 AM |
spydyrwyr
All American
3021 Posts
user info
edit post |
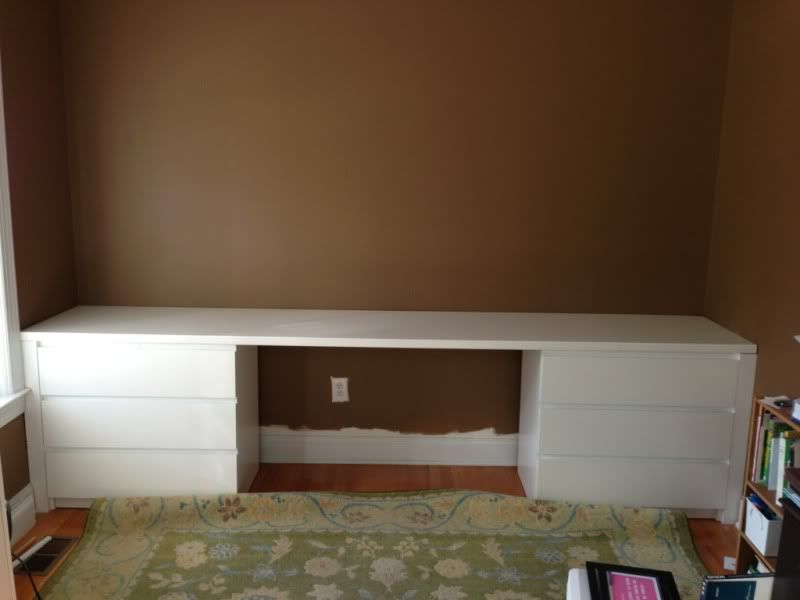
I'm just finishing up a desk/built-in combo in our formal living room which we're converting to a study. The wall in question is 10' wide, room has 9' ceilings. I've been working on them for about 3 weeks, off and on, and I'm pretty excited with the way everything turned out. I've got less than $400 in the whole project.
I started with two IKEA 3-drawer chests, an 8' IKEA laminate counter top and a 6' counter top. I screwed a 2x4 to the studs across the back wall to act as a ledge for the c'tops to sit on, and added pocket hole screws to scew the c'tops down to it. Ripped both c'tops down to the proper width, cross-cut the shorter c'top (and I was left with a ~4' scrap c'top for future projects).
I didn't use the tops of the 3-drawer chests, instead I added pocket holes to attach directly to the countertops. This was strong enough for me to stand on, right in the middle of the "bridge."
Planned out the number of shelves and heights, etc. (the Wifey called the shots on all this):
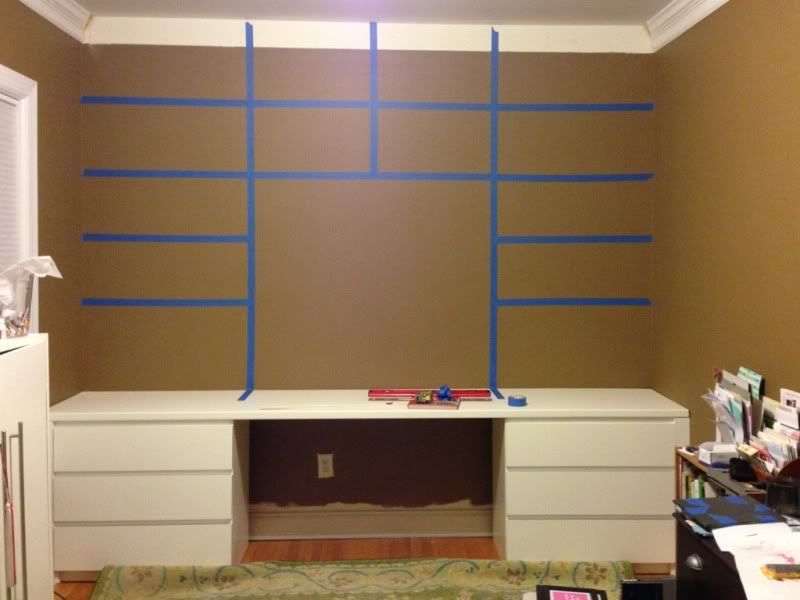
Then cut everything and assembled it for fitment and leveling, etc. (b/c the walls aren't perfect, every shelf and piece had a different dimension to keep everything level and true).
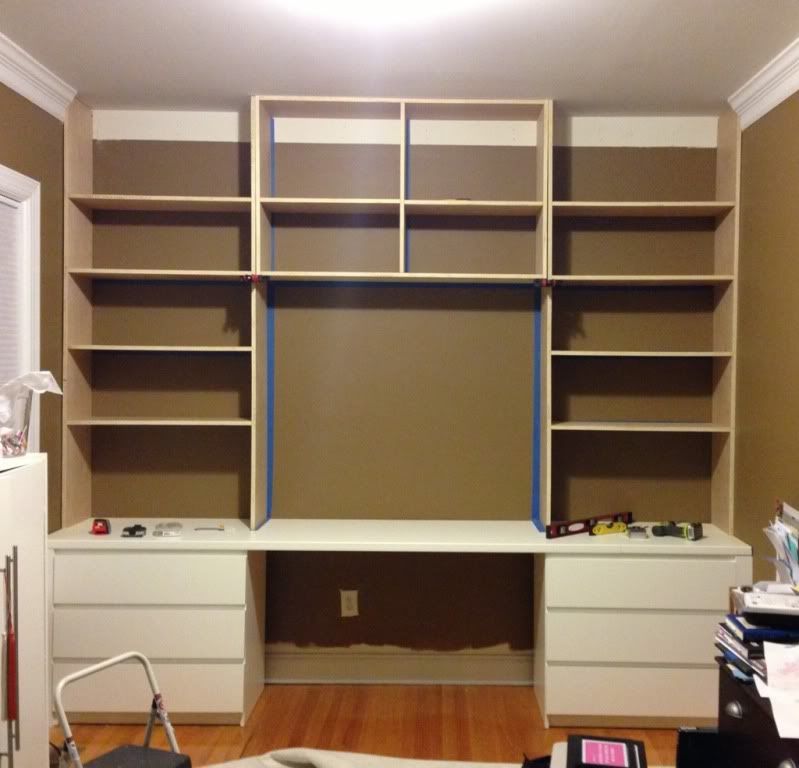
Took it all apart again, painted it in the garage, then re-assembled. Trimmed it out and the Wifey started to fill it up. I still have lots of touch-up, spackling and caulking to do, and finish the brown paint on the top and bottom, but you get the gist:

[Edited on April 1, 2013 at 9:50 AM. Reason : links] 4/1/2013 9:48:16 AM |
CalledToArms
All American
22025 Posts
user info
edit post |
looks great. I think it would look even better with the back painted a different, brighter color than the rest of the walls in the room but you two did a great job. Setups like that are a great use of wall space imo.
[Edited on April 1, 2013 at 10:21 AM. Reason : ] 4/1/2013 10:21:19 AM |
wdprice3
BinaryBuffonary
45908 Posts
user info
edit post |
Nice! I wish I had those skills. I'm working on stuff for my garage so hopefully I'll do enough to pick up some skills for nice interior/finish work.
I also agree with using a different color on that back wall. 4/1/2013 11:24:28 AM |
wdprice3
BinaryBuffonary
45908 Posts
user info
edit post |
Lumber question: for garage shelving/storage, what lumber would you guys use? 1/2" sanded ply for lower shelving/workbench and 1/2" OSB for higher/storage shelving? I guess this also depends on the spans, though I'll probably overengineer these anyways.
Also, am I correct in thinking that a "2x4 stud" just means it's 93" long and a normal "2x4" is 96" long? Or is there another difference?
[Edited on April 1, 2013 at 1:32 PM. Reason : .] 4/1/2013 1:29:00 PM |
wdprice3
BinaryBuffonary
45908 Posts
user info
edit post |
ha, also... lumber source? I've priced lowe's, home depot, capital city lumber, and builder's discount center... Lowe's is the cheapest, then HD, then BDC, then CCL... I know Lowe's/HD get some crap wood in their stock, but it can't be all bad can it?  4/1/2013 2:05:24 PM |
spydyrwyr
All American
3021 Posts
user info
edit post |
^^^^, ^^^ thanks for the compliments! We discussed a higher contrast color, but decided against it, at least for now. The wife likes painting and is really good at cutting in, so it wouldn't be too big of a hassle to change things up. But the shelves will likely be pretty full and in the center above the computer she's going to do a large fabric bulletin board (inspiration board?) that will be brighter/bolder colors, so the "plain" walls give her some flexibility to change it up if she wants... more of a blank canvas.
^^I'd suggest doubling up the 1/2" ply for the workbench surface, that way it's more sturdy and you can swap them if/when the top later gets dirty and worn down a bit.
For shelves, I'd probably go with 3/4" OSB if there is going to be any kind of span in order to prevent sagging, unless of course you're framing each shelf with 2x4. The cost difference b/t 1/2" and 3/4" OSB is not much considering the increased rigidity.
[Edited on April 1, 2013 at 3:19 PM. Reason : .] 4/1/2013 3:17:35 PM |
CalledToArms
All American
22025 Posts
user info
edit post |
even with the shelves full you'd be amazed at how much a bold color makes an impact (actually it works better with the shelves full and just bits and pieces of the bold color showing through). Not saying you have to do it, just responding. It looks good as is still though, just my personal preference
Agreed that it can be done pretty easily at a later time though.
[Edited on April 1, 2013 at 3:21 PM. Reason : ] 4/1/2013 3:20:59 PM |
KillaB
All American
1652 Posts
user info
edit post |
The garage shelves I built with some advice from the good folks in message_topic.aspx?topic=635878 thread.


Not nearly as neat/professional as some of you guys, but they are super sturdy and hold a ton of junk. Really pleased with how they came out. Worked out to about 15 ft of 16" deep shelving for less than $150. The garage grade wire shelving would have run me around $550, so I'm extremely satisfied with the result! Thanks TWWers for your advice! 4/6/2013 9:29:41 PM |
NeuseRvrRat
hello Mr. NSA!
35376 Posts
user info
edit post |
good job 4/6/2013 10:52:36 PM |
Senez
All American
8112 Posts
user info
edit post |
The two-year kitchen reno continues. Cabinet doors finally made and going up.
 4/7/2013 12:40:08 PM |
Bobby Light
All American
2650 Posts
user info
edit post |
KillaB, how'd you sink $150 into that? 2x's are cheap. What am I missing?
[Edited on April 8, 2013 at 9:09 PM. Reason : .] 4/8/2013 9:09:21 PM |
smoothcrim
Universal Magnetic!
18917 Posts
user info
edit post |
that wood looks like cedar (camera?) 4/8/2013 9:16:22 PM |
NeuseRvrRat
hello Mr. NSA!
35376 Posts
user info
edit post |
probably used plywood instead of OSB 4/8/2013 9:30:18 PM |
KillaB
All American
1652 Posts
user info
edit post |
Sorry, the $150 included some tools and stuff I did not have. The shelving is 3/4" plywood too so it was a little pricey. (I think around $24 a sheet at Lowe's and I got 2 sheets. Screws were actually more expensive than I thought too. I probably dropped $20 in screws. I also ended up with some surplus 2x4s because I bought extra in case I screwed something up.
The biggest cost increase was that I went through the "Top Choice" 2x4x96s that Lowes had because the stack if 2x4s on the floor was picked over and mostly a twisted pile of poop.they were and extra 0.45 a board or that adds up over the 22 2x4s I bought.
So basically, the cost was mostly due to choice on my part. Could have done them cheaper (around $90 probably) if I had all the little things I needed and chose lower quality wood. 4/9/2013 7:23:06 AM |
NutGrass
All American
3695 Posts
user info
edit post |

I just got done building two of these by the house for deer hunting.
4/9/2013 2:34:19 PM |
wdprice3
BinaryBuffonary
45908 Posts
user info
edit post |
I just put out 200 lb of seed and 55 bales of straw 4/9/2013 2:48:21 PM |
djeternal
Bee Hugger
62661 Posts
user info
edit post |
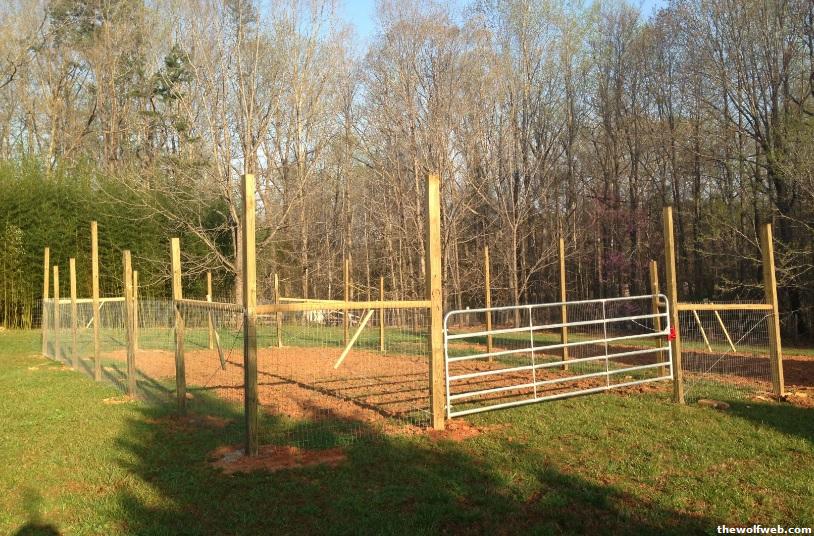
We found out the hard way that our garden was directly on top of the leech field for our septic system. $1400 in repairs later, we decided it would be best to relocate the garden. I decided this would be the perfect time to build a proper fence around it. I still need to add another level of wire across the top, add some rabbit-proofing to the gap at the bottom of the gate, and cut down the posts to make them level with the top of the wire after I add it. Here's my progress so far:
 4/10/2013 8:21:30 AM |
wdprice3
BinaryBuffonary
45908 Posts
user info
edit post |
did you put some posts through your drain lines? 4/10/2013 8:29:26 AM |
djeternal
Bee Hugger
62661 Posts
user info
edit post |
No, but the multiple years of driving over it with a tractor and tilling it definitely took it's toll. It was actually nowhere near as bad as it could have been. Only had to repair 2 lines. The only reason it was so expensive was that the first company we had come out didn't fix the problem. 4/10/2013 8:43:22 AM |
slaptit
All American
2991 Posts
user info
edit post |
KillaB, I'm glad we talked you out of the wire shelving  4/10/2013 7:51:10 PM |
NutGrass
All American
3695 Posts
user info
edit post |
KillaB, I used 2x3s for my studs, 3/4 plywood, and a 1x4 furring strip to trim my shelves in my shop (see a few thumbs up). I liked the hidden stud look. 4/11/2013 12:40:35 AM |
KillaB
All American
1652 Posts
user info
edit post |
I thought about getting some 1x and trimming out the front a little bit to give it a little cleaner look. I also thought about painting it as well. I am intending to do 2x3s to start with, but my dad talked me out of it. Oh well! Doubtful this is the last project I'll do around the house, can try something like that next time 4/11/2013 8:24:25 AM |
wdprice3
BinaryBuffonary
45908 Posts
user info
edit post |
Fence design & staining question:
I am installing about 18 LF of fencing around a small pad for my trash cans. It is located at the corner of my garage, in front of my house. The paint/stain plans are to match the front porch and fencing, since those are in the same field of view. It will be about 5' high at it's maximum, reducing in actual height from one side to the other, due to the slope of the driveway/pad (e.g., the top of the fence will be level).
My color scheme for the porch will be semi-gloss (or high gloss?) white verticals (pickets, posts, kick plates on stairs) and oak brown semi-solid stain on horizontals (decking, steps, railing).
My idea was to paint the pickets with the same white paint, and then stain the top and bottom rails of the fence with the oak brown. However, I've also thought about staining the fence posts the same as well, to give it a more finished look.
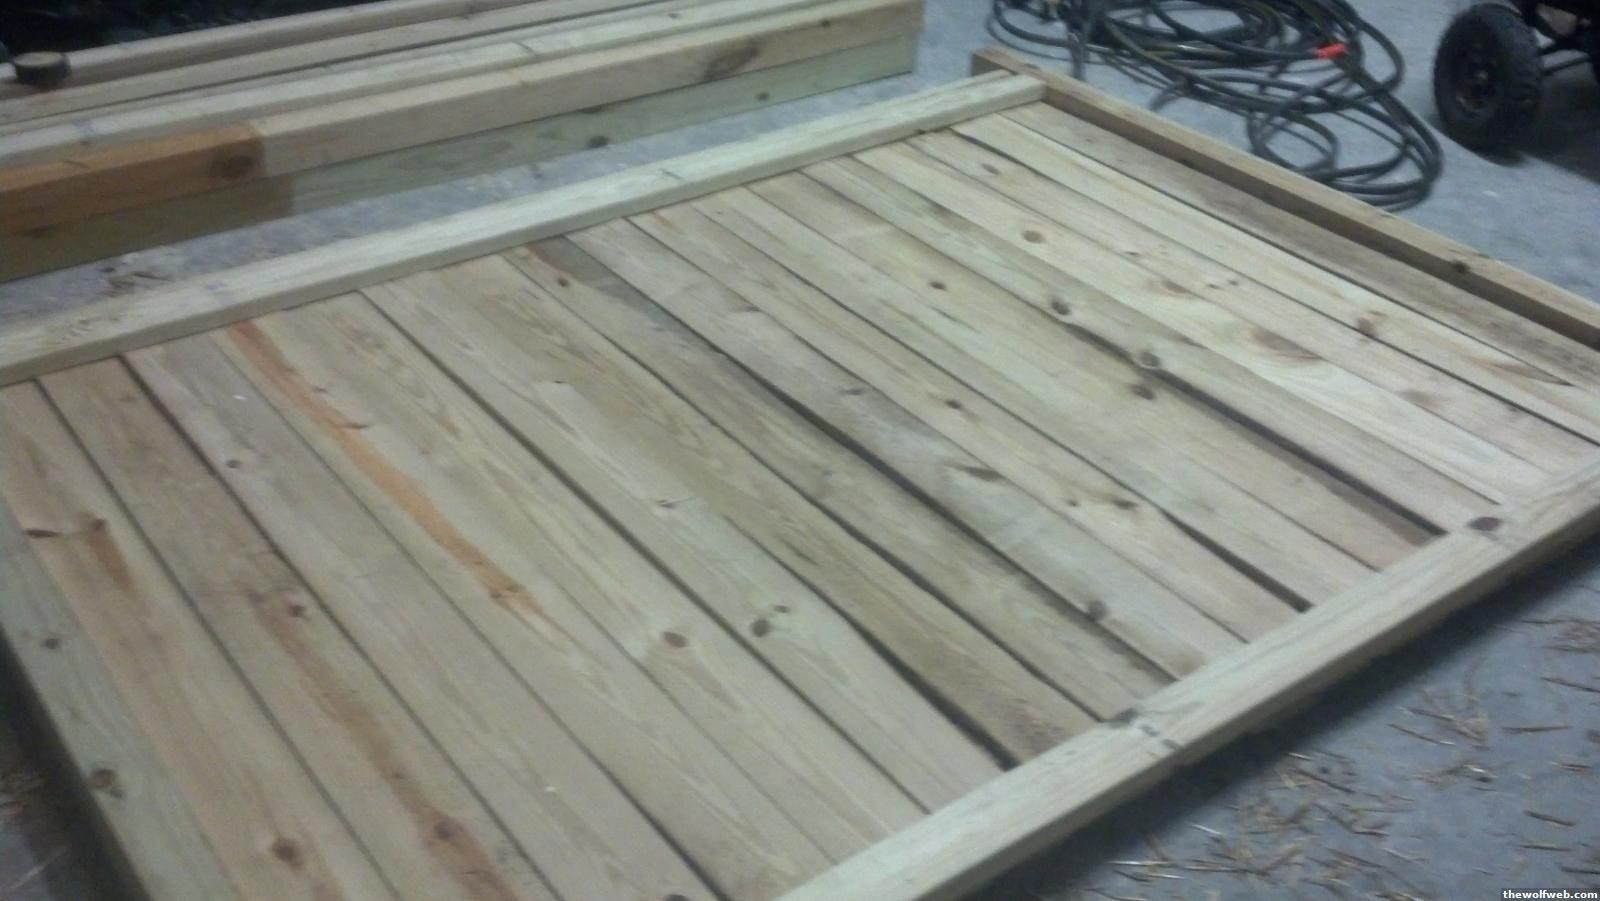
So, does this color scheme and locations seem to work? Also, I can't figure out what fence details to use. It will be stick-built with pickets (already have the materials). I've pretty much decided on a partition style fence (pickets go from center of post to center of post, with rails at the top and bottom on each side of the pickets (e.g., the rails are flush with the outer edges of the posts). See pics below. Thoughts on that design? I also can't decide on the top plate and post height. Do I cut the posts to the same height as the pickets and run a top plate over everything; or do I leave the posts about 5-6" higher than the pickets and use decorative post caps? For the top plate, I had thought to just use a 2x4, which sits flush with everything (top rail and sides of posts). Though, I often see more decorative top caps.
Extended posts w/ 2x4 top cap
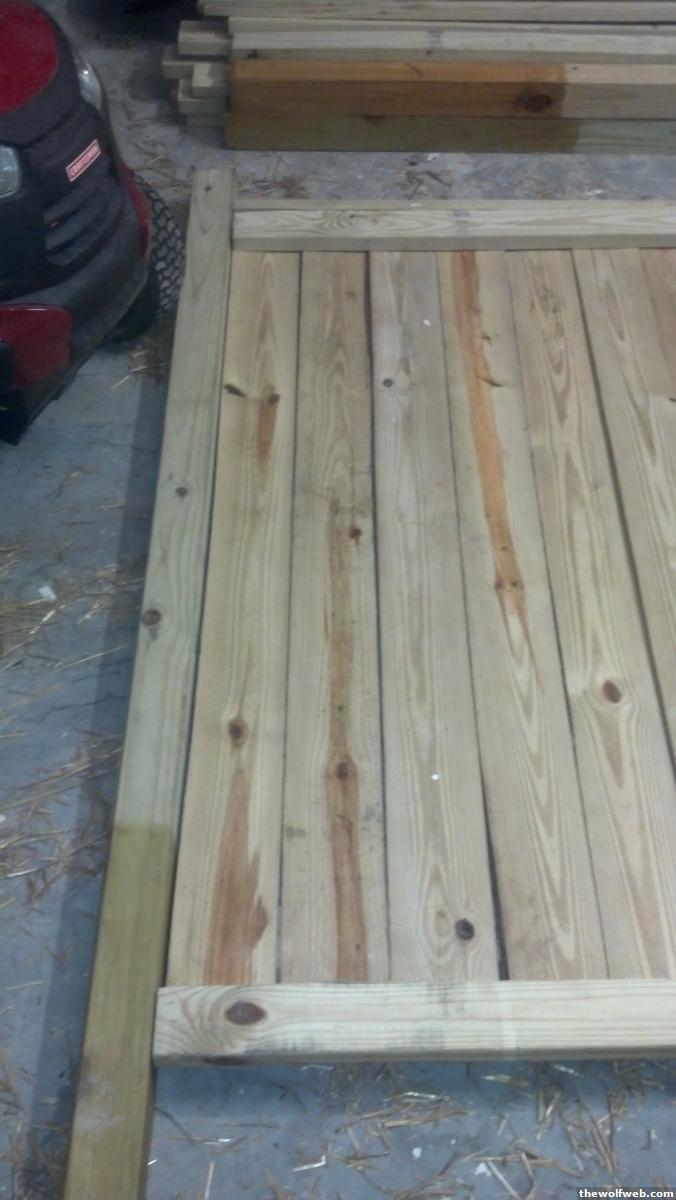
Flush posts w/ 2x4 top cap
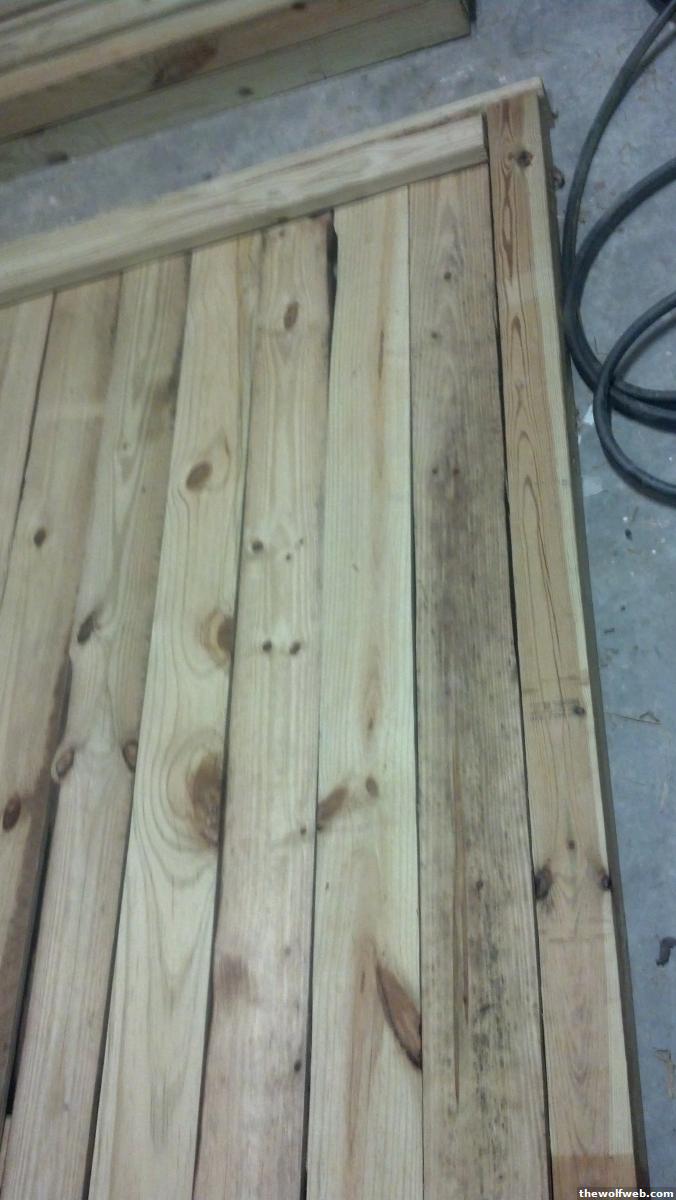
General design idea (with extended post option)
Thoughts? thanks
[Edited on April 12, 2013 at 9:32 AM. Reason : .] 4/12/2013 9:31:43 AM |
NutGrass
All American
3695 Posts
user info
edit post |
^Its all up to you and how you want it to look and function.
But, I would try to build something like this

And stain it all oak brown. The reason I like the offset pickets is that the pickets that you have placed now are never really going to lay flat with one another, and create the wall look you're going for. Just my thoughts. 4/12/2013 10:05:11 AM |
wdprice3
BinaryBuffonary
45908 Posts
user info
edit post |
Thanks. I actually hate that style of fence so I won't be going with it. As far as the stain; I was avoiding going all stain on the fence so it blends in better with the house/porch and isn't something that really sticks out (which I think a oak brown fence would do).
I appreciate the comments though.
By "lay flat", if you mean vertical bowing; I have no problem adding a third rail; though I would likely only do a third rail on the "inside" (house side).
[Edited on April 12, 2013 at 10:49 AM. Reason : .] 4/12/2013 10:47:51 AM |
MaximaDrvr
10378 Posts
user info
edit post |
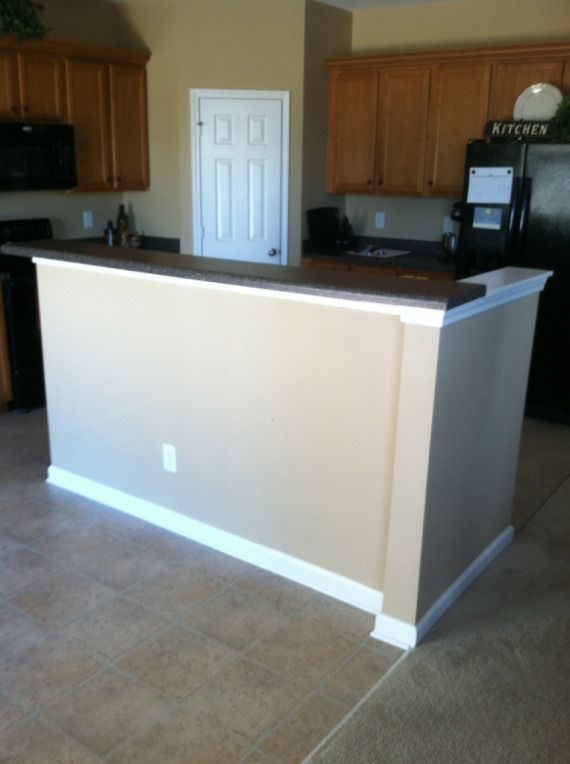
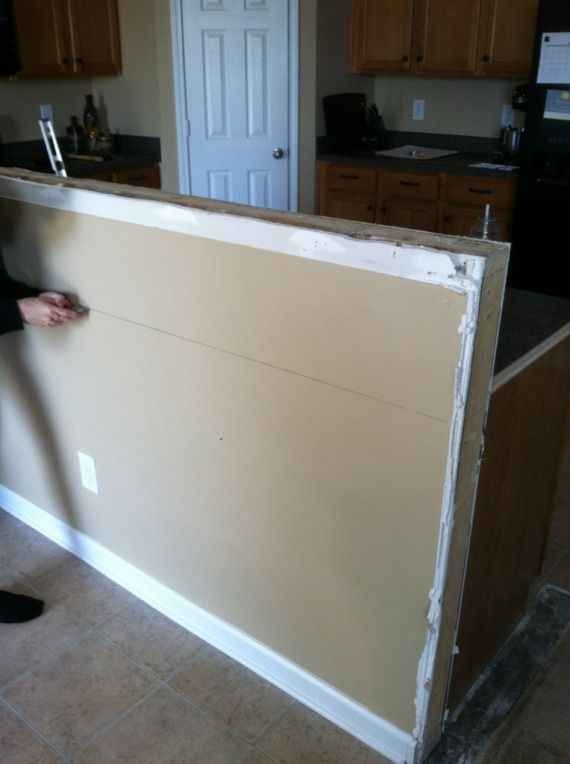
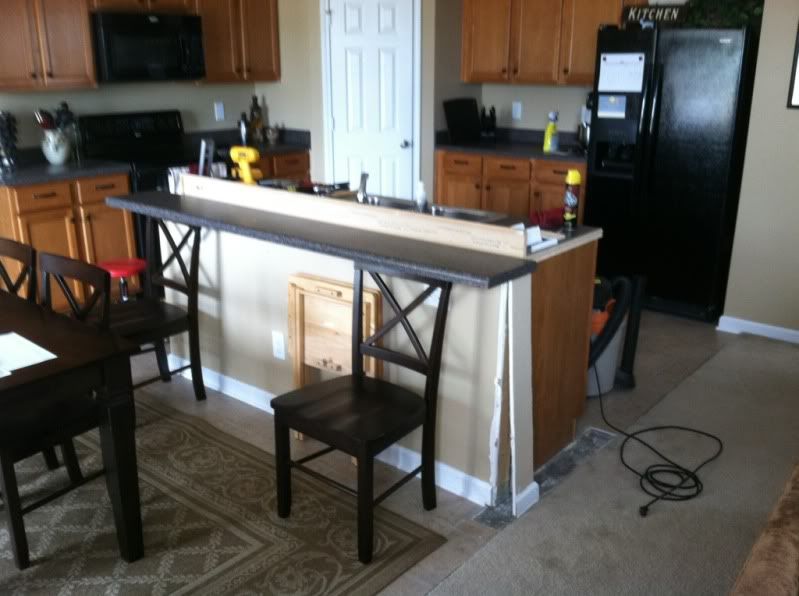
Started ripping out my island for granite prep...
We cut the raised bar portion out, relocated two electrical boxes to the back side, and relocated the dish washer and garbage disposal switches under the sink.
My wife wants to donate the old counter tops, so that is why it still has the lip on it after demo.
Started like this:
Demo:
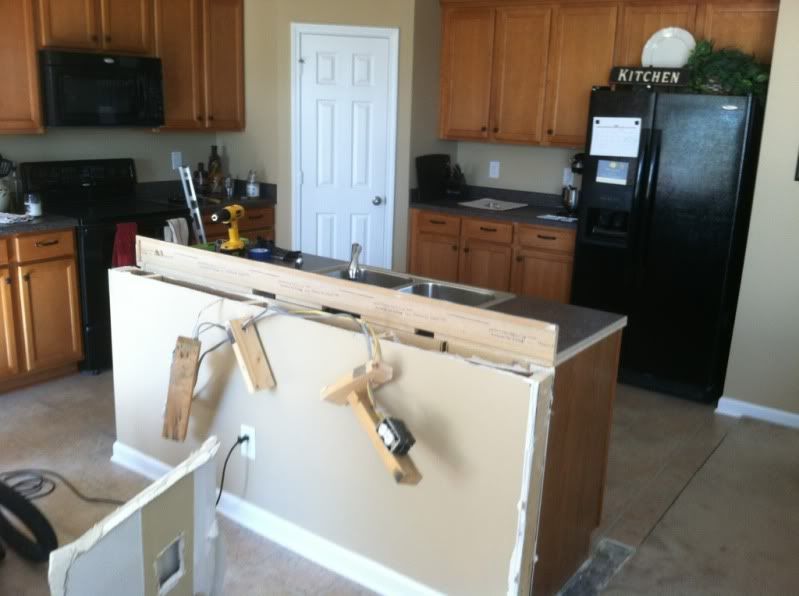
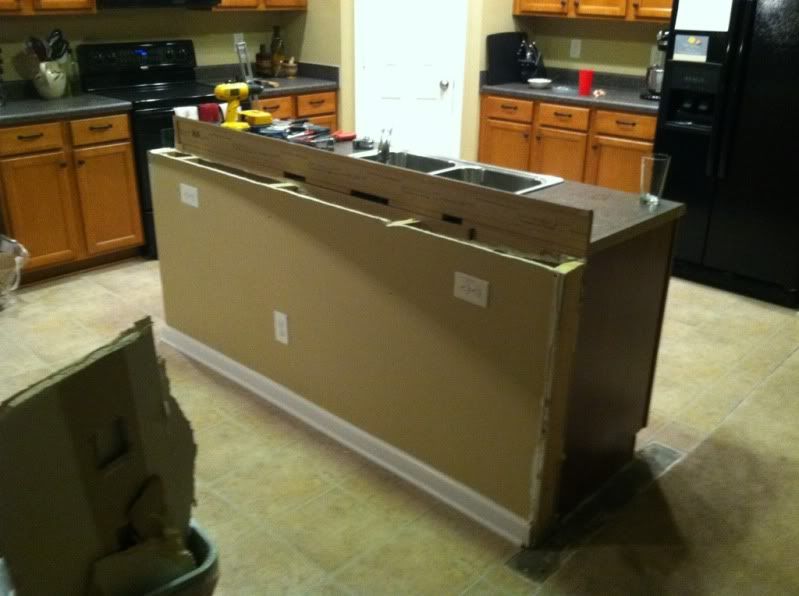
Mock-up of how the granite will sit:
[Edited on April 15, 2013 at 1:49 PM. Reason : .] 4/15/2013 1:26:37 PM |
djeternal
Bee Hugger
62661 Posts
user info
edit post |
It appears that wdprice3 and I have very similar yard tractors. Mine's the YTS 3000, 46". What you workin' wit? 4/15/2013 4:06:45 PM |
CalledToArms
All American
22025 Posts
user info
edit post |
| Quote : | "Started ripping out my island for granite prep...
We cut the raised bar portion out, relocated two electrical boxes to the back side" |
Weird, we are doing the exact same thing to a peninsula in our kitchen at some point this year
Are you installing the granite yourselves? We're planning on getting the quartz counters installed by someone else but would like to do the demo work to cut down the raised bar and relocate the electrical outlets ourselves. Not sure what prep work we may have to do to really get it ready for the installers.
You're probably similar to us in that having a really shallow high-bar is not very functional but you're planning to put one level flat surface for the new counter right?4/15/2013 5:03:40 PM |
MaximaDrvr
10378 Posts
user info
edit post |
We are having a company come in and install the granite. We are doing all the prep, electrical, and plumbing.
That is exactly what we are going. The raised portion was 1' deep. Now we will have a flat island about 40" x 80" 4/15/2013 5:33:38 PM |
spydyrwyr
All American
3021 Posts
user info
edit post |
^^^it's not a "real" JD, but it sure runs great and gets the job done. Got it used.
 4/15/2013 5:56:09 PM |
djeternal
Bee Hugger
62661 Posts
user info
edit post |
I busted up the deck on my yard tractor yesterday and had to take it off to get a piece welded back on. Gave me a reason to replace the belt and sharpen the blades while I have it off though. Also discovered that the clutch cable that engages the blades is almost completely frayed, so I ordered the replacement part for that. All in all, fucking up my mower turned out to be a blessing, lol.
[Edited on April 15, 2013 at 6:07 PM. Reason : a] 4/15/2013 6:05:20 PM |
wdprice3
BinaryBuffonary
45908 Posts
user info
edit post |
Working with the same mower, DJ. Pretty decent I guess. Hood vibrates and makes a lot of noise though.
I need to learn how to maintain it so I don't have to worry about getting it to a local shop. 4/16/2013 9:48:13 AM |